The Ultimate Driving Test Checklist: Your Essential Guide to Passing Day

Driving Test Checklist

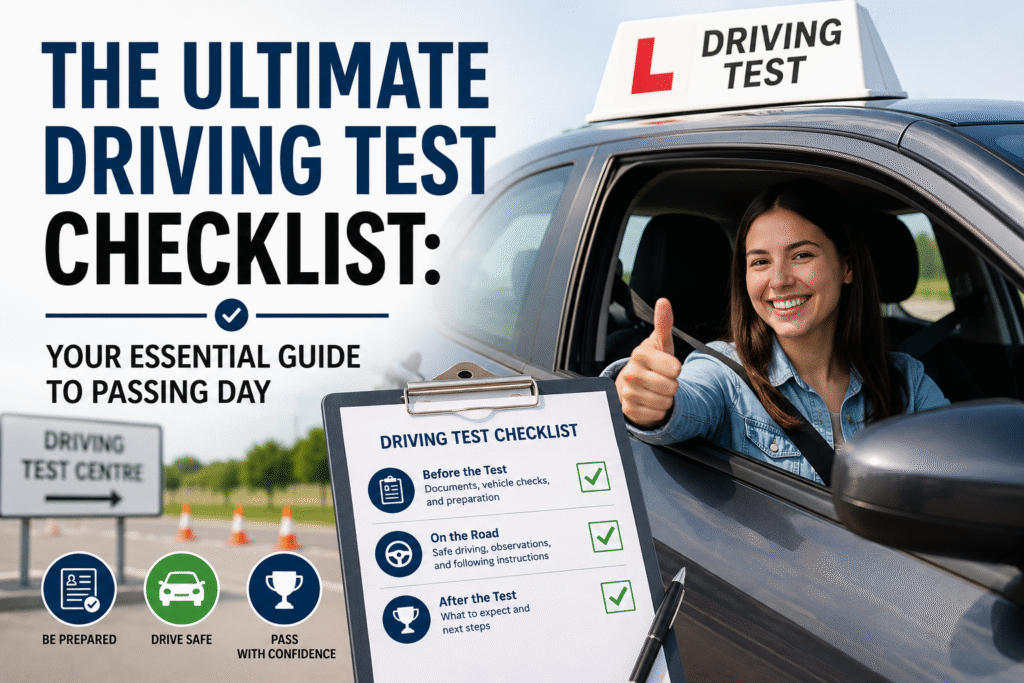
Stepping up to the driving test center on evaluation day represents a massive milestone on your journey toward true personal independence. The sheer excitement of earning your driver’s license is completely natural, yet the buildup to the practical exam can frequently cause an unexpected wave of nerves and anxiety. To clear away this pre-test tension and guarantee everything runs without a hitch, keeping a comprehensive, professionally compiled Driving Test Checklist right by your side is an absolute lifesaver. From packing your essential legal paperwork to making sure your training vehicle meets strict examiner guidelines, entering the testing center fully organized keeps your mind focused entirely on the road ahead. At RBD Driving School, we understand that proper preparation is just as critical as your behind-the-wheel abilities.

Many learner drivers fall short on test day not because of poor driving mechanics, but because they overlook minor administration rules or missing paperwork. By taking a proactive approach and double-checking your paperwork early, you ensure that you do not face a stressful last-minute cancellation. Let us walk step-by-step through an authoritative checklist driving test structure to ensure you arrive at the examination site completely prepared, confident, and ready to pass.

Organizing Your Administration and Legal Paperwork

The absolute worst way to kick off your evaluation morning is scrambling through your bags looking for your physical paperwork while your examiner waits by the desk. If you fail to produce your valid original identification papers upon request, the testing staff is legally required to cancel your exam immediately, and you will lose your booking fee. Incorporating these vital paperwork checks into your personal checklist driving test ensures a stress-free check-in process:

  1. Your Physical Provisional Driving Licence: You must present your original plastic photocard licence to the testing examiner. Paper photocopies, digital phone pictures, or expired passports will never be accepted under any circumstances.
  2. The Theory Test Pass Certificate: While modern testing computers usually have your digital records synced up, carrying your physical paper theory pass letter acts as a crucial safety net if the test center runs into a temporary network outage.
  3. The Official Booking Confirmation Details: Keep a printout or a clear, offline smartphone screenshot of your official booking email, noting down your exact time window, confirmation reference number, and test center address.

Preparing Your Car for the Driving Road Test Checklist

Whether you choose to use your professional instructor’s car or your family’s private vehicle, the test car must strictly pass the examiner’s safety standards. If the testing officer spots a dashboard warning light or a cracked mirror glass, they can refuse to sit in the vehicle, immediately failing your attempt. Reviewing this specialized driving road test checklist guarantees your vehicle stays fully compliant:


  • Correct L-Plate Placement: Standard L-plates must be clearly displayed on both the front and rear bumpers of the vehicle. Ensure they are mounted securely so they do not fly off at high speeds, and check that they do not block the driver’s view.
  • The Passenger Interior Rear-View Mirror: You must provide an additional slip-on, adjustable rear-view mirror mounted to the windshield for the examiner’s use. This allows them to monitor traffic behind the vehicle clearly throughout the test.
  • Tread Depth and Tyre Health: Check that all four tyres exceed the legal minimum tread depth across the center section and are inflated to the exact manufacturer specifications.
  • Flawless Working Electronics: Your brake lights, turn indicators, headlights, and windscreen wipers must operate perfectly. Ask a friend or family member to stand outside the car while you test each function.
  • A Clean and Orderly Cabin: Clean out your footwells, dashboard cubbies, and door pockets, removing any loose water bottles or trash that could roll under the control pedals during an emergency stop.

Step-by-Step Practical Routine of the Exam

Demystifying what happens during your forty-minute test window goes a long way toward settling your nerves. The typical evaluation structure follows a very specific sequence, allowing you to mentally prepare for each phase well in advance.

  1. The Eyesight Verification Test: Before heading to the vehicle, your examiner will ask you to read a standard vehicle registration plate from a legal distance of 20 meters. If you need glasses or contact lenses to read it, you must wear them throughout the driving portion of the test.
  2. The “Show Me, Tell Me” Safety Questions: You will face two vehicle safety questions. The “tell me” question is asked at the test center before you drive, explaining a basic maintenance check. The “show me” question is asked while you are moving, requiring you to operate a basic control like the window demister or horn safely.
  3. The General Driving Session: You will traverse a variety of public roads, navigating realistic traffic situations, roundabouts, junctions, and varying speed limits to demonstrate your natural control.
  4. The Essential Reversing Manoeuvre: Your examiner will ask you to execute one reversing exercise, testing your accuracy during a parallel park, a reverse bay park, a forward bay park, or pulling up on the right-hand side of the road and reversing back two car lengths.
  5. The Independent Driving Phase: For roughly twenty minutes of the test, you will drive independently by following directions from a satellite navigation device or by following traffic signs to a specific destination.

Proactive Strategies to Handle Pre-Test Nerves

Mental readiness is just as critical as your physical muscle memory. Knowing how to maintain your focus under the quiet observation of an examiner allows your natural skills to shine through effortlessly.

  • Treat the Day Like a Standard Lesson: Avoid putting intense, artificial pressure on yourself. Reframe the evaluation in your mind as simply another structured cruise with an expert assessor who just wants to verify that you drive safely.
  • Schedule a Warm-Up Drive: Book a one-hour practice lesson with your instructor right before your exam time. This helps settle your initial nerves, warms up your muscle reflexes, and gets you accustomed to the current road conditions.
  • Listen Carefully to Directions: If you do not hear or understand a specific navigation instruction, calmly ask the examiner to repeat it. Taking the wrong turn or missing an exit does not mean you fail, as long as you continue to drive safely and legally.

Conclusion: Partner with RBD Driving School

Navigating your practical exam becomes an organized, highly manageable task when you utilize a comprehensive Driving Test Checklist and ground your preparation in consistent practice. By eliminating administrative surprises and ensuring your training vehicle is pristine, you clear a smooth path straight toward earning your full driver’s license.

At RBD Driving School, our highly skilled, patient instructors are completely dedicated to preparing you for every single detail of the testing process. Contact our friendly team today to schedule your tailored mock exams and take your final steps toward road independence with complete confidence.